Nintendo Switch 2 Data Transfer Guide
How to transfer your game data and saves from your old Switch to the new Switch 2.
How to transfer your game data and saves from your old Switch to the new Switch 2.
Nintendo Switch 2 Data Transfer Guide
So, you've finally got your hands on the shiny new Nintendo Switch 2! Congratulations! It's an exciting time, filled with anticipation for new games and enhanced experiences. But before you dive headfirst into the next generation of Nintendo gaming, there's one crucial step you'll want to take: transferring all your precious game data, save files, and user profiles from your old Nintendo Switch to your new Switch 2. Nobody wants to lose hundreds of hours of progress in Animal Crossing, or their meticulously crafted Pokémon team, right?
This comprehensive guide will walk you through every aspect of data transfer, ensuring a smooth and seamless transition. We'll cover everything from user profiles and save data to downloaded games and screenshots. We'll also discuss the different methods available, compare their pros and cons, and recommend specific tools or services that can make the process even easier. Get ready to move your digital life to your new console!
Understanding Nintendo Switch Data Types and Storage
Before we jump into the transfer methods, it's important to understand how Nintendo Switch stores different types of data. This knowledge will help you choose the most efficient transfer strategy.
Nintendo Switch User Profiles and Save Data Storage
Your user profile contains your Nintendo Account link, play activity, and various settings. Crucially, your game save data is tied to your user profile. Most save data is stored directly on the console's internal memory. This is a key point: save data is generally NOT stored on microSD cards, even if the game itself is installed there. This is a security measure to prevent save data manipulation and piracy.
Nintendo Switch Downloaded Games and Software Storage
Digital games, downloadable content (DLC), and software updates are stored either on the console's internal memory or on a microSD card if you have one inserted. When you download a game, you can choose where it's installed. If your old Switch has a large microSD card filled with games, you'll want to consider how to transfer these efficiently.
Nintendo Switch Screenshots and Video Captures Storage
Screenshots and video clips you capture are also stored on the console's internal memory or on a microSD card. These are generally easier to transfer than save data, as they are just media files.
Method 1 Transferring User Profiles and Save Data Directly
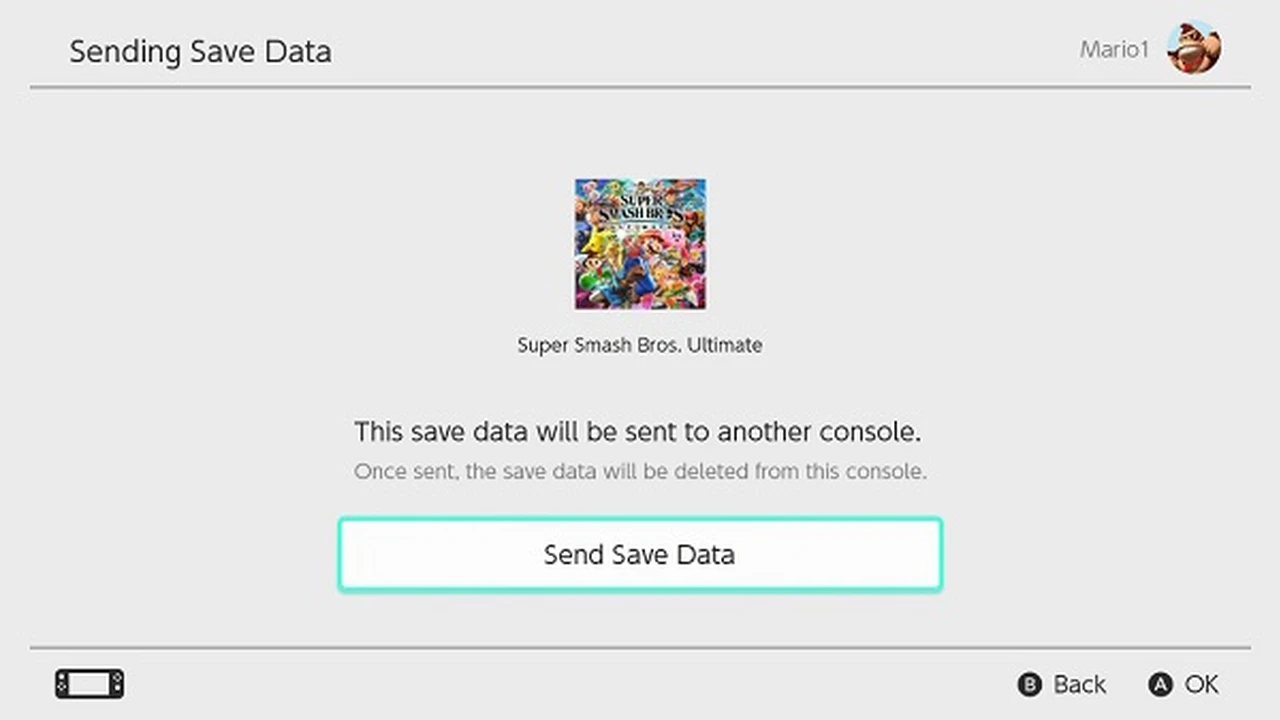
This is the most direct and often recommended method for moving your entire user profile, including all associated save data, from one Switch console to another. It requires both consoles to be present and connected to the internet.
Step by Step Guide for User Profile and Save Data Transfer
- Prepare Both Consoles: Ensure both your old Nintendo Switch and your new Nintendo Switch 2 are updated to the latest system software. Connect both consoles to the internet. Make sure both are plugged into power or have sufficient battery life.
- On Your Old Switch (Source Console):
- Go to System Settings > Users > Transfer Your User and Save Data.
- Select 'Next' and then 'Source Console'.
- Confirm that you want to transfer data from this console.
- On Your New Switch 2 (Target Console):
- Go to System Settings > Users > Transfer Your User and Save Data.
- Select 'Next' and then 'Target Console'.
- When prompted, select 'Receive Data'.
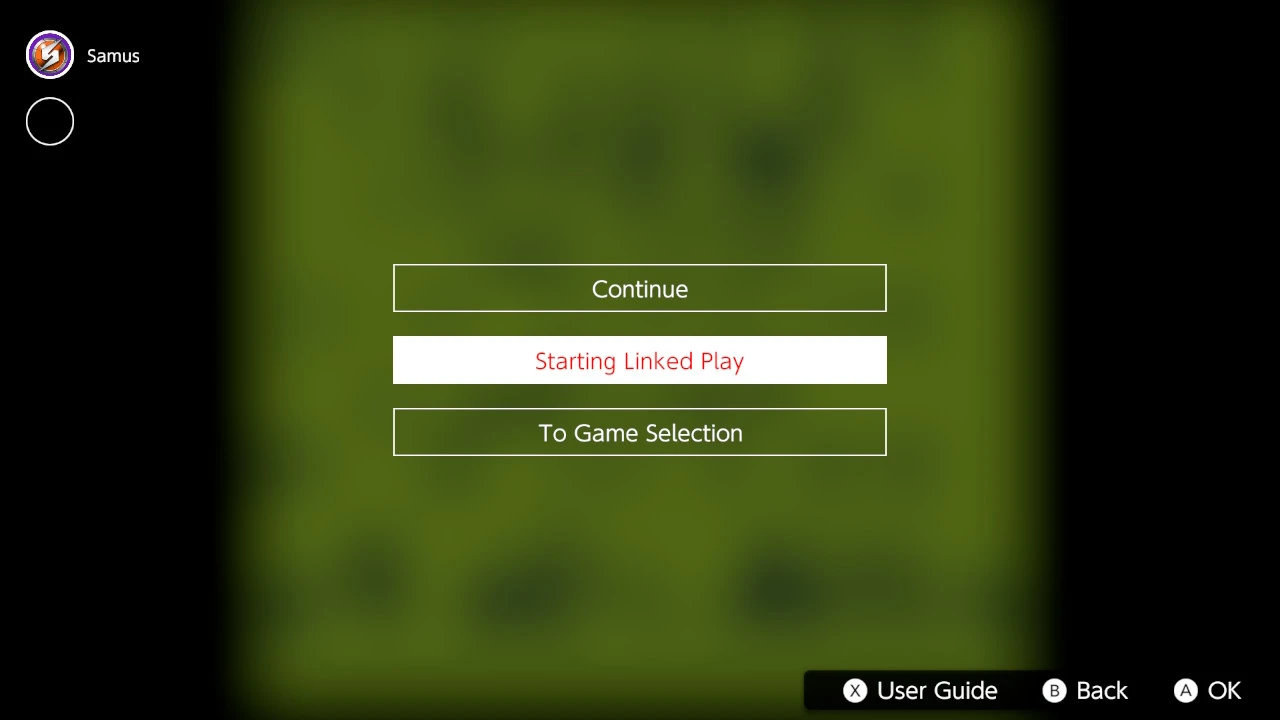
- Connect the Consoles: The target console (Switch 2) will now search for the source console (old Switch). Once found, confirm the transfer on both screens.
- Start the Transfer: The transfer process will begin. This can take some time depending on the amount of data. Do NOT power off either console or disconnect them from the internet during this process.
- Completion: Once the transfer is complete, the user profile and all associated save data will be moved from your old Switch to your new Switch 2. The user profile and save data will be deleted from the old Switch.
Pros and Cons of Direct Data Transfer
- Pros: Transfers all save data for a user at once, relatively straightforward, ensures data integrity.
- Cons: Requires both consoles to be present, deletes data from the source console (which might be an issue if you plan to keep both active for different users), can be time-consuming for large amounts of data.
Method 2 Using Nintendo Switch Online Cloud Saves
For individual game save data, Nintendo Switch Online (NSO) offers a convenient cloud save feature. This is particularly useful if you don't have both consoles side-by-side, or if you only want to transfer specific game saves.
How Nintendo Switch Online Cloud Saves Work
With an active Nintendo Switch Online subscription, most (but not all) games automatically back up their save data to the cloud. When you start a game on a new console with the same Nintendo Account, the console will attempt to download the latest cloud save.
Step by Step Guide for Cloud Save Transfer
- Ensure NSO Subscription: Make sure you have an active Nintendo Switch Online subscription on your old Switch.
- Enable Cloud Saves: On your old Switch, go to System Settings > Data Management > Save Data Cloud. Ensure 'Automatic Save-Data Backup' is enabled for the games you want to transfer. You can also manually upload saves here.
- Verify Uploads: Check that your desired game saves have been successfully uploaded to the cloud. You can see the status in the Save Data Cloud menu.
- On Your New Switch 2:
- Link your Nintendo Account to a user profile on your new Switch 2.
- Download the games you want to play from the eShop.
- When you launch a game for the first time, it should automatically download your cloud save. If not, go to System Settings > Data Management > Save Data Cloud, select the game, and choose 'Download Save Data'.
Limitations of Cloud Saves and Important Considerations
- Not All Games Supported: Some games, like Animal Crossing: New Horizons and Pokémon titles, do not support standard cloud saves due to their unique save data structures or to prevent cheating. For Animal Crossing, there's a specific Island Transfer Tool. For Pokémon, saves are typically tied to the console or require specific in-game transfer methods. Always check if your critical games support cloud saves.
- Active Subscription Required: You need an active NSO subscription to use and access cloud saves. If your subscription lapses, your cloud saves are typically held for a period (usually 180 days) before being deleted.
- Manual Download Sometimes Needed: While often automatic, sometimes you might need to manually download the save data from the cloud.
Method 3 Transferring Downloaded Games and Software
This section focuses on moving the actual game installations, not the save data. This is where your microSD card comes into play.
Transferring Games via MicroSD Card
If you have a microSD card in your old Switch filled with digital games, you can simply remove it and insert it into your new Switch 2. The Switch 2 should recognize the games. However, there's a catch:
- User Account Association: The games are tied to your Nintendo Account. As long as the same Nintendo Account is linked to a user profile on your Switch 2, you should be able to play the games.
- Re-downloading Updates: You might need to re-download game updates or DLC, as these can sometimes be console-specific or require verification.
- Formatting Issues: If your new Switch 2 prompts you to format the microSD card, DO NOT DO IT unless you've backed up everything. This usually happens if the card was formatted on a different device or has a corrupted file system.
Re-downloading Games from the eShop
The most straightforward way to get your digital games onto your new Switch 2 is to simply re-download them from the Nintendo eShop. Once your Nintendo Account is linked to a user profile on your Switch 2:
- Go to the Nintendo eShop.
- Select your user icon in the top right corner.
- Go to 'Redownload'. You'll see a list of all games you've purchased digitally.
- Select the games you want to download.
Pros and Cons of Re-downloading
- Pros: Simple, reliable, ensures you get the latest version of the game.
- Cons: Requires a good internet connection, can be very time-consuming for a large game library, consumes bandwidth.
Method 4 Transferring Screenshots and Video Captures
Your captured moments are precious! Here's how to move them.
Transferring via MicroSD Card
If your screenshots and videos are saved to a microSD card, you can simply transfer the card to your new Switch 2. The console should recognize them and display them in the Album.
Transferring to a Computer
You can also transfer screenshots and videos to a computer for backup or to move them to your new Switch 2's microSD card:
- Remove MicroSD Card: Take the microSD card out of your old Switch.
- Insert into Computer: Use a card reader to insert the microSD card into your computer.
- Locate Files: Navigate to the 'Nintendo' folder, then 'Album'. Inside, you'll find folders organized by date containing your captures.
- Copy Files: Copy the desired files to your computer.
- Transfer to New Switch 2 (Optional): If you want them on your new Switch 2's microSD card, insert a formatted microSD card into your computer and copy the files to the 'Nintendo/Album' folder on that card.
Transferring Wirelessly to a Smart Device
For individual captures, you can also send them directly to your smartphone or tablet:
- On your Switch, go to the Album.
- Select the image or video you want to transfer.
- Press 'A' for Sharing and Editing, then 'Send to a Smart Device'.
- Scan the first QR code with your smart device's camera to connect to the Switch's Wi-Fi hotspot.
- Scan the second QR code to open the download page in your browser.
- Download the image or video.
Specific Game Save Data Transfer Scenarios
As mentioned, some games have unique save data transfer methods. It's crucial to be aware of these to avoid losing progress.
Animal Crossing New Horizons Island Transfer Tool
Animal Crossing: New Horizons does not support standard cloud saves. Instead, Nintendo provides a dedicated 'Island Transfer Tool' application on the eShop. You need to download this tool on both your old Switch and your new Switch 2 to move your island data. Follow the in-app instructions carefully, as this is a one-way transfer that deletes the island from the source console.
Pokémon Game Save Data
Pokémon games (e.g., Sword/Shield, Scarlet/Violet) also typically do not support standard cloud saves. Your save data is usually tied to the console. If you're transferring to a new Switch 2, the 'Transfer Your User and Save Data' method (Method 1) is the most reliable way to move your Pokémon saves along with your user profile. There are also specific in-game features like Pokémon HOME that allow you to transfer your Pokémon creatures between games and consoles, but this is separate from the game's save file itself.
Other Games with Unique Save Systems
Always check the official support pages or in-game menus for any specific game you're concerned about. Some games might have their own internal save backup/restore options or require specific steps.
Recommended Tools and Accessories for Data Transfer
While much of the transfer can be done with just the consoles, a few accessories can make the process smoother, especially for large game libraries or media files.
High-Speed MicroSD Cards
If you're planning to re-download a lot of games or store many screenshots, a high-capacity, high-speed microSD card is essential for your new Switch 2. Look for cards with A1 or A2 app performance ratings and U3 speed class for optimal performance.
- SanDisk Extreme microSDXC (128GB, 256GB, 512GB, 1TB): These are officially licensed by Nintendo and offer excellent read/write speeds. They are reliable and widely available. Prices range from $20 for 128GB to $150+ for 1TB.
- Samsung EVO Select microSDXC (128GB, 256GB, 512GB): Another highly reputable brand offering great value and performance. Often slightly cheaper than SanDisk. Expect to pay around $15 for 128GB to $70 for 512GB.
- Lexar PLAY microSDXC (256GB, 512GB, 1TB): Designed specifically for gaming, these cards offer good speeds and competitive pricing.
Usage Scenario: Insert into your new Switch 2 to expand storage for downloaded games. If you have a large card from your old Switch, you can try transferring it directly, but re-downloading to a fresh card on the Switch 2 is often cleaner.
USB-C to USB-A Adapter or USB-C Hub
While the Switch 2 will likely retain USB-C, a hub or adapter can be useful for connecting external storage devices (though not directly for game saves) or for connecting to a PC for media transfer if you don't have a direct microSD card slot.
- Anker USB C Hub (various models): Anker is known for reliable USB-C accessories. A small hub with a few USB-A ports and an SD card slot can be incredibly versatile. Prices vary from $20-$50.
- UGREEN USB C to USB A Adapter: A simple, inexpensive adapter if you just need to connect a standard USB drive or cable to your Switch 2. Around $8-$15.
Usage Scenario: Connecting a USB drive to transfer screenshots/videos (if the Switch 2 supports it directly, which the original Switch does not for general file transfer), or connecting your Switch 2 to a PC for specific data management if Nintendo introduces new PC connectivity features.
Reliable Wi-Fi Router
For re-downloading games and using cloud saves, a stable and fast internet connection is paramount. While not a Switch accessory, ensuring your home network is up to snuff will significantly speed up the process.
- TP-Link Archer AX21 AX1800 Wi-Fi 6 Router: A popular and affordable Wi-Fi 6 router that offers good speeds and coverage for most homes. Around $70-$100.
- Google Nest Wifi Pro: For larger homes or those wanting a mesh system for seamless coverage, Nest Wifi Pro offers excellent performance and ease of use. Prices start around $200 for a single unit.
Usage Scenario: Essential for all digital downloads, cloud save synchronization, and system updates on your new Switch 2.
Troubleshooting Common Data Transfer Issues
Even with the best preparation, sometimes things go wrong. Here are some common issues and how to address them.
Insufficient Space on Target Console
If your new Switch 2 doesn't have enough internal storage for all your save data, the direct transfer method might fail. Consider archiving or deleting some games on your old Switch (remember, save data is separate) or ensuring your new Switch 2 has a large enough microSD card for game installations.
Network Connectivity Problems
Both direct transfer and cloud saves rely on a stable internet connection. If you encounter errors, check your Wi-Fi signal, restart your router, or try moving closer to your router. Ensure no firewalls are blocking Nintendo's servers.
Corrupted Save Data
Rarely, save data can become corrupted. If a specific game save won't transfer or causes issues, try deleting the local save data for that game on your old Switch (after ensuring a cloud backup if possible) and then re-downloading it or attempting the transfer again.
Nintendo Account Linking Issues
Ensure your Nintendo Account is correctly linked to a user profile on your new Switch 2. Without this, you won't be able to access your digital purchases or cloud saves.
MicroSD Card Not Recognized or Needs Formatting
If your Switch 2 doesn't recognize your old microSD card, or asks to format it, try these steps:
- Restart the Switch 2: Sometimes a simple restart can fix recognition issues.
- Reinsert the Card: Ensure the card is fully and correctly inserted.
- Test on Another Device: If possible, try the card in a computer or another Switch to see if it's readable.
- Backup and Format (Last Resort): If the card is truly unreadable by the Switch 2 and you've backed up all important data (especially screenshots/videos), then formatting it on the Switch 2 might be necessary. This will erase all data on the card.
Preparing Your Old Switch for Retirement or Resale
Once all your data is safely on your new Switch 2, you might be wondering what to do with your old console. If you're selling it or giving it away, it's crucial to factory reset it to protect your personal information.
Factory Resetting Your Old Nintendo Switch
- Ensure Data Transfer is Complete: Double-check that all desired user profiles, save data, and media have been transferred or backed up. Remember, a factory reset will erase everything.
- De-link Nintendo Account: It's a good idea to de-link your Nintendo Account from the console. Go to eShop > User Icon > Scroll down to 'Deregister Primary Console'.
- Perform Factory Reset: Go to System Settings > System > Formatting Options > Initialize Console. This will wipe all data, settings, and user profiles from the console.
By following these steps, you can ensure a smooth and secure transition to your new Nintendo Switch 2, allowing you to enjoy all its new features without losing a single moment of your gaming history.
:max_bytes(150000):strip_icc()/277019-baked-pork-chops-with-cream-of-mushroom-soup-DDMFS-beauty-4x3-BG-7505-5762b731cf30447d9cbbbbbf387beafa.jpg)


